Step-by-Step Guide to Installing a Rear View Camera for Car
Adding a Rear View Camera for Car is one of the most effective ways to improve safety and convenience while driving. Whether you struggle with parallel parking, reversing in tight spaces, or simply want more confidence on the road, installing a rear view camera is a worthwhile upgrade. The good news is that you don’t always need professional help—many camera kits are designed for DIY installation. In this guide, we’ll walk you through the step-by-step process of installing a rear view camera in your car.
Step 1: Gather the Necessary Tools and Equipment
Before you begin, make sure you have everything you’ll need:
-
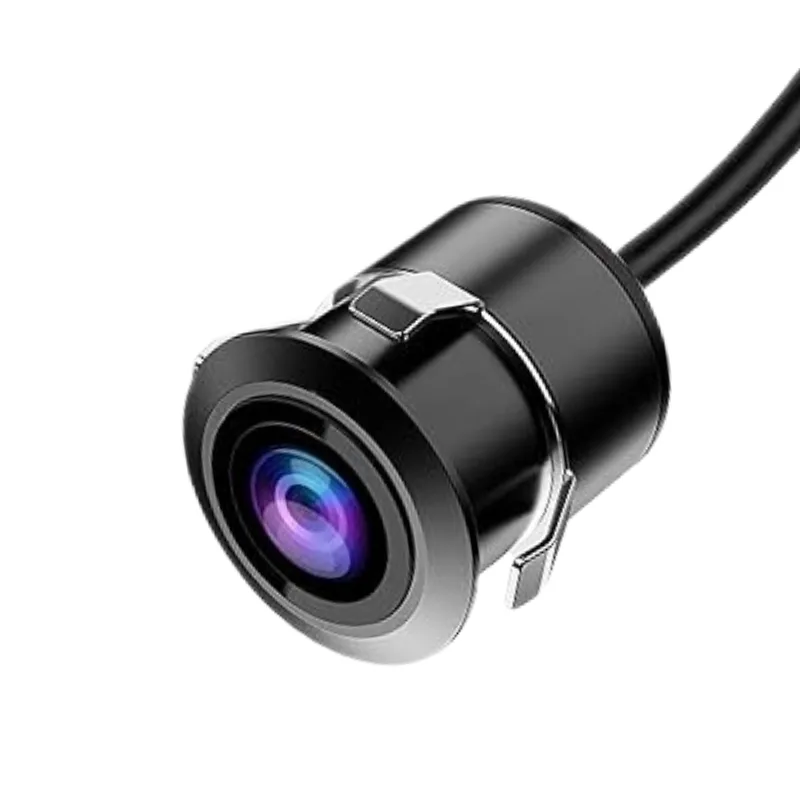
Rear view camera kit (camera, cables, and monitor or compatible infotainment system)
-
Screwdrivers and drill (if required)
-
Electrical tape and zip ties
-
Wire stripper and crimper
-
Fuse tap or adapter for power connection
Having the right tools on hand makes the process smoother and prevents interruptions mid-installation.
Step 2: Choose the Camera Placement
Most rear view cameras are mounted above the license plate or integrated into the bumper. License plate frames with built-in cameras are the easiest to install since they require minimal drilling. When selecting a position, ensure that the camera provides a clear, unobstructed view of the area behind your car.
Step 3: Mount the Camera
Once you’ve chosen the placement, secure the camera using the screws or brackets provided in the kit. Make sure it is firmly attached and angled slightly downward to capture the full rear view. If drilling is required, double-check alignment before making holes to avoid mistakes.
Step 4: Route the Camera Wires
The camera wires need to be routed from the rear of the car to the dashboard or infotainment system. This usually involves threading the cables through the trunk, under the car’s interior panels, and up to the front of the vehicle. Use zip ties to keep the wires neat and secure, preventing them from interfering with other components.
Step 5: Connect the Power Supply
Most rear view cameras draw power from the reverse light circuit, meaning the camera activates automatically when you shift into reverse. To connect the power:
-
Locate the reverse light wiring in the trunk.
-
Use a wire stripper to expose a section of the positive and negative wires.
-
Connect the camera’s power wires to these terminals (positive to positive, ground to ground).
-
Secure the connections with electrical tape or crimp connectors.
Alternatively, some advanced models can be connected to the fuse box for continuous power.
Step 6: Connect the Video Cable to the Display
Next, run the video cable (usually a yellow RCA connector) from the camera to the monitor or infotainment system. If your car already has a compatible display, plug the cable into the designated video input port. If not, you can install a standalone screen on the dashboard or rearview mirror.
Wireless camera kits simplify this process by transmitting video signals without long cables, though they may require careful pairing.
Step 7: Test the System
Once all connections are complete, turn on your car and shift into reverse gear. The display should automatically show the rear camera feed. Adjust the camera angle if needed to ensure maximum visibility. Check for features like parking guidelines, brightness adjustments, and clarity at night.
Step 8: Secure and Finalize
After testing, neatly secure all cables using zip ties and replace any interior panels you removed. Make sure everything is tightly fixed and that the wires are protected from wear and tear.
Conclusion
Installing a rear view camera may seem complicated, but with the right tools and guidance, it’s a manageable DIY project. From improving parking confidence to ensuring safety for pedestrians and children, the benefits are well worth the effort. By following this step-by-step guide, you’ll not only upgrade your car’s safety features but also enjoy a more stress-free driving experience.
Categorie
Leggi tutto
Board games are not just about the fun inside. The box sets the mood even before you open it. Custom board game boxes play a huge role in attracting players and delivering a complete gaming experience. Good packaging makes your game memorable from the start. When designed well, the box does much more than hold pieces. It builds excitement, reflects the game’s theme, and keeps everything...

In today’s world, maintaining a clean and healthy environment in homes, offices, and commercial spaces is crucial. Unpleasant odors can come from a wide range of sources, including carpets, upholstery, ducts, tile grout, and furniture. These odors are not only uncomfortable but can also negatively affect indoor air quality and overall well-being. To achieve long-lasting freshness, the...

If you're searching for the best car repair and service in Hyderabad, you're not alone. With the city's growing traffic, unpredictable road conditions, and ever-evolving automobile technology, reliable car maintenance is no longer a luxury—it's a necessity. Whether you're driving a hatchback, sedan, SUV, or a luxury vehicle, ensuring your car runs smoothly with regular servicing and...

How Genuine Jaguar Parts Ensure a Smooth Driving Experience The Importance of Using Manufacturer-Approved Components Why Original Parts Maintain Performance Standards Every Jaguar leaves the factory with components that have been meticulously engineered to match the exact specifications of the model. These parts are the result of significant testing, ensuring they integrate seamlessly with the...

The Global Parking Management Market leads the nation's so-called 'renaissance', such that each industrial segment is endowed with well-efficient and networked solutions. IT infrastructure forms a necessity, ranging from cloud storage to cybersecurity. Based on market performance during 2025-2032, the sector experiences a CAGR of 9.57%, whereas valuation continues to provide proof of the...