Mastering DIY: How to Make Floating Shelves Step-by-Step Like a Pro
Floating shelves have become one of the most popular DIY projects for homeowners who want to blend modern design with functional storage. Whether you’re looking to display décor, books, or kitchenware, learning how to make floating shelves is a rewarding and budget-friendly way to enhance your home. With just a few tools and materials, you can create beautiful, sturdy shelves that seem to “float” effortlessly on the wall.
In this detailed guide, we’ll walk you through everything you need to know — from choosing the right materials to mounting your finished shelves securely.
Why Choose Floating Shelves?
Before learning how to make floating shelves, it helps to understand why they’re such a favorite among homeowners and interior designers. Floating shelves are wall-mounted units that appear to have no visible brackets or supports. Their clean, minimalist design makes them ideal for nearly any décor style — rustic, modern, farmhouse, or industrial.
Here are some benefits that make floating shelves a great addition to your space:
-
Space-Saving Design:
Floating shelves maximize wall space without taking up floor area. They’re perfect for small rooms or apartments. -
Customizable:
You can build them in any size, color, or finish to match your interior style. -
Affordable and Easy to Build:
With basic tools, even beginner DIYers can make floating shelves in just a few hours. -
Stylish and Functional:
Floating shelves can serve as both décor and practical storage — holding anything from plants to books and kitchen items.
Materials You’ll Need
Before you start, gather all the necessary tools and supplies. To make standard wooden floating shelves, you’ll need:
-
Wood boards (pine, oak, or plywood)
-
Wood screws
-
Drill and drill bits
-
Wood glue
-
Measuring tape
-
Level
-
Stud finder
-
Sandpaper or sander
-
Wood stain or paint
-
Clear wood sealer (optional)
-
Mounting brackets or hidden shelf supports
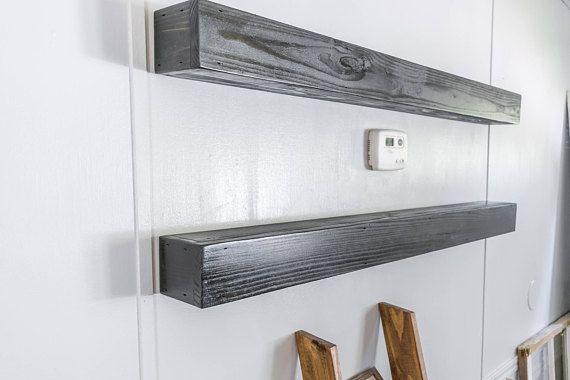
For a clean “floating” appearance, many DIYers use hidden mounting brackets or hollow shelf designs that slip over a wall-mounted frame.
Step-by-Step Guide: How to Make Floating Shelves
Step 1: Measure and Plan
Decide where you want to install your floating shelves. Use a measuring tape to determine the ideal length, width, and depth based on your wall space and intended use. Mark your measurements with a pencil, ensuring the shelves will fit evenly and look balanced.
If you’re making multiple shelves, it’s best to keep the spacing consistent for a neat, professional look.
Step 2: Cut the Wood
Using a saw, cut your wood boards to the desired dimensions. You’ll typically need three pieces per shelf:
-
Top panel
-
Bottom panel
-
Front face
You can also create a hollow box-style shelf that fits over a wooden cleat mounted to the wall. This design hides the mounting hardware completely, achieving that sleek floating effect.
Step 3: Sand the Surfaces
Use sandpaper or an electric sander to smooth out the wood surfaces and edges. This step removes splinters and prepares the wood for staining or painting later. Start with a coarse grit (like 80) and finish with a finer grit (like 220) for a polished surface.
Step 4: Assemble the Shelf
Attach the top and bottom panels together using wood glue and screws. Then, secure the front face to create a hollow box shape. Wipe away excess glue with a damp cloth and let it dry completely.
If you’re using solid wood instead of a hollow box, you can simply attach hidden brackets underneath later on.
Step 5: Stain or Paint the Shelf
Now it’s time to give your floating shelves their final look. Apply your chosen wood stain for a natural, rustic finish, or paint them in a color that matches your décor.
Once dry, apply a clear sealer to protect the surface from moisture, scratches, and wear.
Step 6: Mount the Shelf Bracket or Cleat
Find the wall studs using a stud finder — this ensures your shelves will be secure enough to hold weight. Mark the stud locations with a pencil.
Install your floating shelf bracket or wooden cleat directly into the studs using heavy-duty screws. Use a level to make sure it’s perfectly straight before tightening.
Step 7: Install the Shelf
Slide your assembled shelf onto the mounted bracket or cleat. It should fit snugly for a seamless “floating” appearance. Secure it in place with screws from the underside or back if necessary.
Double-check that the shelf is level before placing any items on top.
Tips for Perfect Floating Shelves
-
Choose Quality Wood:
Solid hardwoods like oak, maple, or pine provide better durability and aesthetic appeal. -
Hide Seams and Screws:
Use wood filler or putty to conceal screw holes and seams before finishing. -
Test Weight Capacity:
Before displaying heavy items, test your shelf’s stability to avoid damage. -
Match Décor Style:
Stain the shelves darker for an industrial look or lighter for a farmhouse or minimalist theme. -
Add Lighting:
For extra flair, install LED strip lights underneath your floating shelves to highlight décor pieces.
Creative Uses for Floating Shelves
Once you know how to make floating shelves, you can use them creatively in different rooms:
-
Living Room: Showcase plants, books, and art pieces.
-
Kitchen: Store spices, plates, or mugs.
-
Bathroom: Hold towels, candles, and toiletries.
-
Bedroom: Use as bedside tables or to display personal mementos.
-
Office: Keep books, files, and decorative items organized.
Floating shelves not only make your home look stylish but also maximize storage without cluttering your space.
Final Thoughts
Learning how to make floating shelves is a simple DIY project that delivers impressive results. With the right materials and a bit of patience, you can create custom shelves that enhance your home’s style and functionality. Whether you prefer a sleek modern look or a rustic farmhouse feel, floating shelves are the perfect solution for adding beauty and practicality to any room.
So grab your tools, choose your favorite wood finish, and start building. Once installed, you’ll have not only a useful storage solution but also a piece of decor that reflects your creativity and craftsmanship.
Kategoriler
Read More
Introduction Spiritual AI Chatbots for faith Communities are changing how churches and faith groups connect with people. These chatbots can answer questions, share prayers, guide visitors, and help staff with tasks. This guide explains what they are, how they work, and how your community can use them safely and well. It is written in a clear and friendly way so anyone can understand. What is a...

Africa’s financial landscape is undergoing a dramatic transformation. A combination of a young, tech-savvy population, increasing mobile phone penetration, and a pressing need for financial inclusion has propelled financial technology—fintech—to the forefront of the continent’s economic evolution. At the heart of this revolution is African Fintech Live, a platform that...
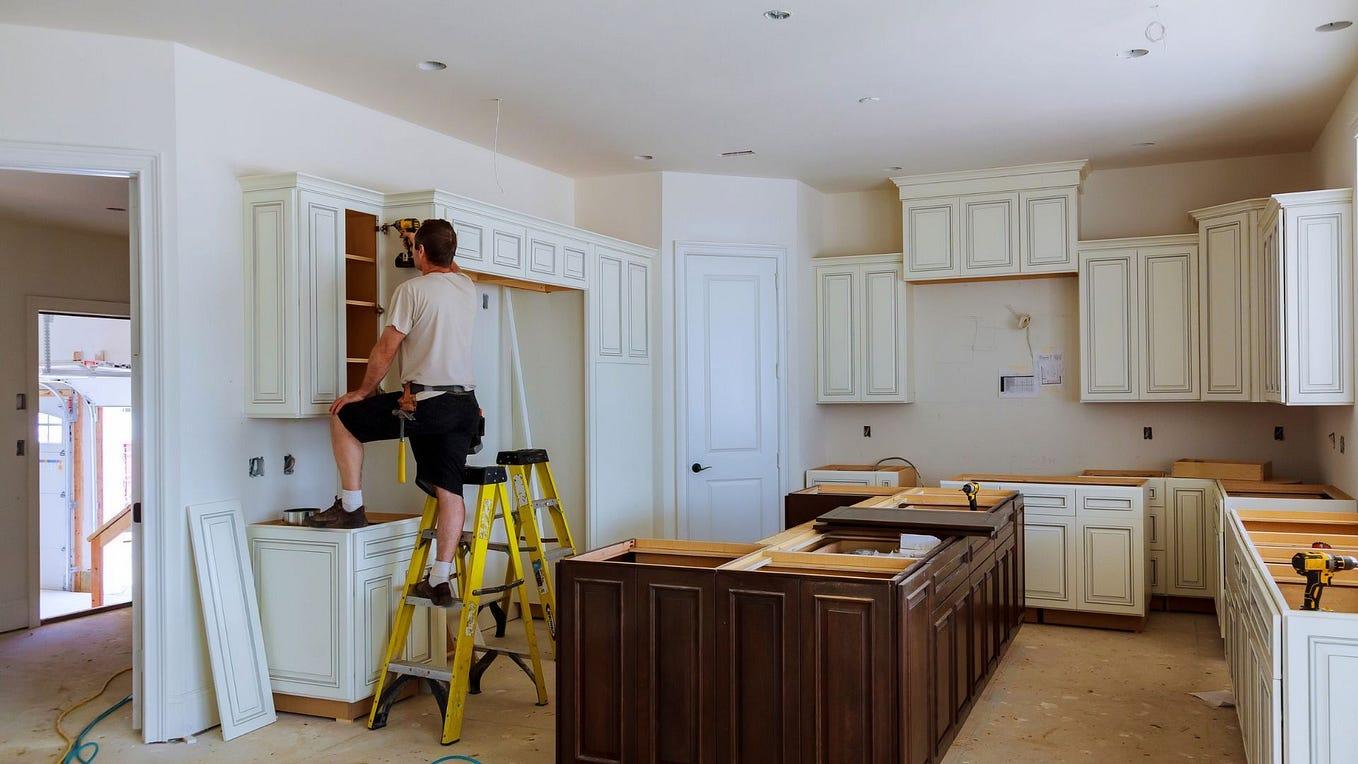
Transforming your kitchen or bathroom can dramatically enhance the comfort, functionality, and value of your home. In Smithfield, VA, homeowners are increasingly investing in professional remodels to modernize their spaces, improve usability, and create a style that reflects their personal taste. Professional kitchen and bathroom remodels in Smithfield VA ensure every detail—from layout...
Get The Best Escort Service Near Me In Kanpur's 4-5 Star Hotels Nothing is more thrilling than a trip to an escort Service near Kanpur and staying in a luxurious 4 or five star hotel. Our escorts are experts in fine dining, luxury travel and love with distinction. They're the ideal companion to a swanky night out. Whatever you like is, you can choose from attractive models or...

"Detailed Analysis of Executive Summary Large Format Display (LFD) Market Size and Share The global Large Format Display (LFD) market size was valued at USD 14.23 billion in 2024 and is expected to reach USD 22.87 billion by 2032, at a CAGR of 6.1% during the forecast period. This Large Format Display (LFD) Market report serves you with the bigger picture of the...