Mastering Embroidery Digitizing on Hats and Caps
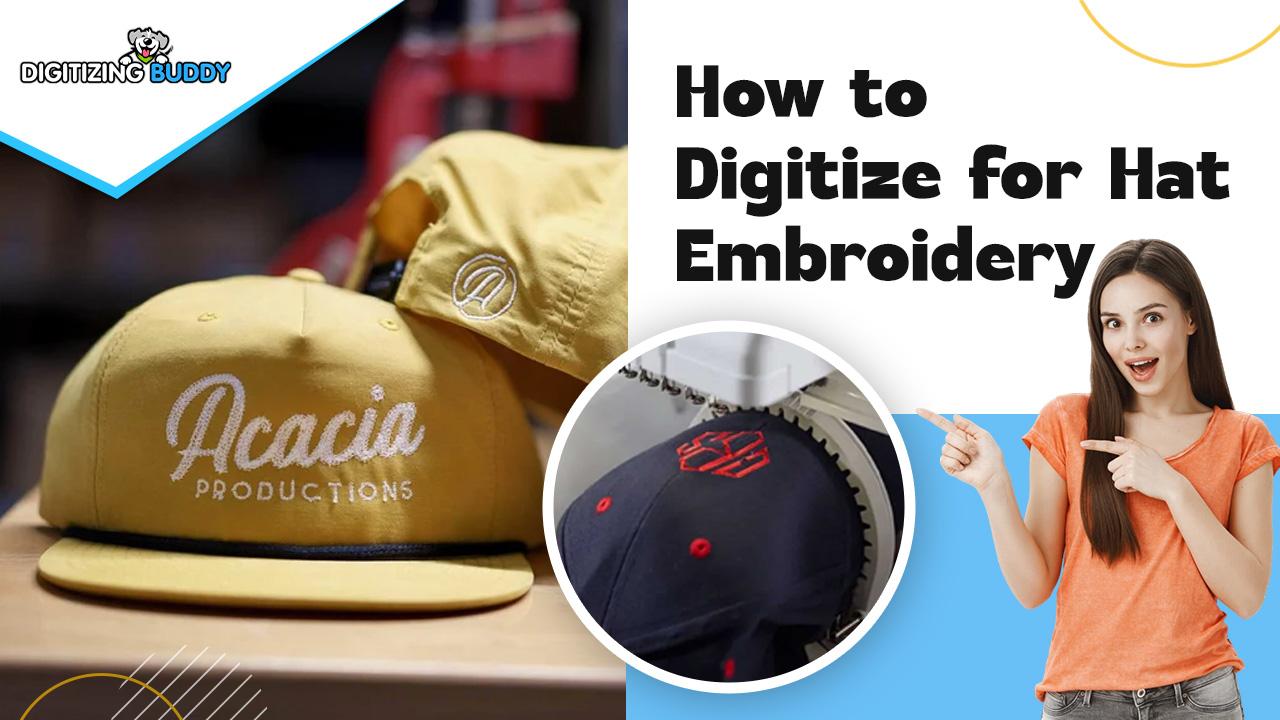
Embroidery on hats transforms ordinary caps into professional, eye-catching accessories. But if you've ever tried stitching a design onto a curved, structured cap brim only to end up with puckered fabric or distorted lettering, you know hats present unique challenges that flat embroidery doesn't. The secret to flawless embroidery digitizing on hats lies in specialized techniques that account for the cap's shape, structure, and fabric.
Why Hats Demand Special Digitizing
Unlike flat fabrics, caps have several features that affect how stitches lay:
- Curved surfaces that distort straight stitches
- Center seams that can throw off alignment
- Stiff buckram lining that resists dense stitching
- Limited space (typically 2.5-3" wide maximum)
A design that looks perfect on a flat test stitch might completely fail on an actual cap if not digitized properly. That's why hat embroidery requires specific techniques from the very first step of creating your digital file.
Preparing Your Design for Hat Embroidery
Start with the Right Artwork
Not all designs work well on caps. Ideal hat embroidery artwork has:
- Bold, simple shapes (thin lines may disappear)
- Minimal small text (anything under 1/4" tall won't stitch cleanly)
- High contrast colors (hats typically use fewer thread colors than flat embroidery)
- Centered composition (asymmetrical designs can look off-balance)
Before digitizing, simplify your design by:
- Converting gradients to solid blocks
- Outlining tiny text to make it more visible
- Removing unnecessary small details
Size Matters More Than You Think
Standard hat embroidery dimensions:
- Front center designs: Max 2.75" wide × 1.5" tall
- Side designs: Max 1.5" diameter
- Back designs: Max 2" wide
Always measure your specific cap's stitch area first—not all hats have the same dimensions. Professional digitizers keep libraries of common cap templates to ensure perfect sizing.
Specialized Digitizing Techniques for Hats
Stitch Direction Is Everything
The way stitches flow makes or breaks hat embroidery:
- Use radial fills that follow the hat's curve (like spokes on a wheel)
- Avoid straight vertical stitches—they gap on curved surfaces
- Angle satin stitches at 30-45 degrees for best coverage
- Stitch outward from center to prevent distortion
Underlay: Your Secret Weapon
Hats need more stabilization than flat fabrics. Essential underlay types:
- Edge run: Outlines the design area to prevent shifting
- Center walk: Reinforces along the cap's center seam
- Tatami fill: Provides base for large filled areas
Without proper underlay, your design will pucker or shift during stitching.
Density Adjustments for Different Cap Materials
Stitch density that works on structured caps may fail on stretchy beanies:
Cap Type |
Recommended Fill Stitch Density |
|
Structured (buckram) |
0.4-0.45mm |
|
Unstructured (stretch fit) |
0.35-0.4mm |
|
Mesh backs |
0.3-0.35mm |
Too dense = stiff, cracked stitches. Too light = gaps in coverage.
Hooping and Positioning Tricks
Even perfect digitizing fails if the hat isn't hooped correctly. Professional techniques:
For Front Designs:
- Mark the cap's exact center with chalk
- Hoop stabilizer only, then adhere cap with temporary spray
- Use a cap driver attachment for perfect alignment
For Side Designs:
- Position the side panel completely flat in the hoop
- Place the seam at 3 or 9 o'clock position (never top or bottom)
- Use basting stitches to secure tricky areas
Pro tip: Magnetic hoops are game-changers for caps—they hold securely without distortion.
Common Hat Embroidery Problems (And Solutions)
Problem: Design Distorts Near Center Seam
Cause: Stitches fighting the seam's raised surface
Fix:
- Digitize to avoid stitching directly over seam
- Use compensating stitches that angle away from seam
Problem: Thread Breaks Constantly
Cause: Sharp angles in stitch path
Fix:
- Add slight curves to corners in digitizing
- Reduce stitch density by 5-10%
Problem: Fabric Puckers Under Design
Cause: Insufficient underlay or improper stabilizer
Fix:
- Add zigzag underlay
- Use two layers of cut-away stabilizer
Advanced Techniques for Professional Results
3D Puff Embroidery
The raised, textured look that makes designs pop:
- Add 1.5-2mm foam under stitches
- Increase stitch density by 15% to compress foam properly
- Use satin stitches at least 5mm wide for best effect
Photorealistic Portraits
Yes, you can stitch faces on caps with:
- Gradient fill stitches that blend colors
- Varied stitch lengths to mimic texture
- Special underlay to prevent distortion
Specialty Threads
Metallic or glow-in-the-dark threads require:
- Slower machine speed
- Larger stitch lengths
- Additional loosening of upper tension
Testing: The Step Too Many Skip
Never stitch directly onto a customer's cap first. Always:
- Stitch on scrap cap material of same type
- Check for tension issues and design flaws
- Make adjustments to the digitized file
- Repeat test if needed
This extra step saves ruined caps and unhappy customers.
Choosing the Right Digitizing Software
For hat-specific digitizing, these programs stand out:
- Wilcom Hatch - Advanced cap curve compensation tools
- Embrilliance - User-friendly with good hat presets
- Pulse Ambassador - Specialized for commercial cap production
Free alternatives like Ink/Stitch can work but lack hat-specific features.
When to Hire a Professional Digitizer
Consider outsourcing your hat designs if:
- You're doing complex logos or portraits
- Small text is involved (less than 1/4" tall)
- You're using specialty techniques like 3D puff
- Consistency across multiple caps is critical
Professional digitizing typically costs $15-$40 per design but prevents costly mistakes.
The Future of Cap Digitizing
Emerging technologies changing the game:
- AI-assisted hat curve compensation
- 3D simulation previews showing exactly how designs will stitch
- Automated density adjustments based on cap material scans
Yet human expertise remains essential for perfecting stitch paths and troubleshooting.
Final Pro Tips
- Start simple—master basic designs before tackling complex artwork
- Build a library of tested files for designs you use often
- Keep notes on what settings work for different cap types
- Invest in quality hoops—they make all the difference
- Never stop testing—each new cap style may need adjustments
Master these techniques, and you'll transform from struggling with hat embroidery to producing professional-quality caps that impress clients and stand up to wear. Remember—the difference between "homemade" and "pro" isn't just the machine; it's in the digitizing details that account for every curve and seam of the cap.
Now go forth and stitch some amazing caps—your digitizing skills are the only limit to what you can create!
Categorias
Leia mais
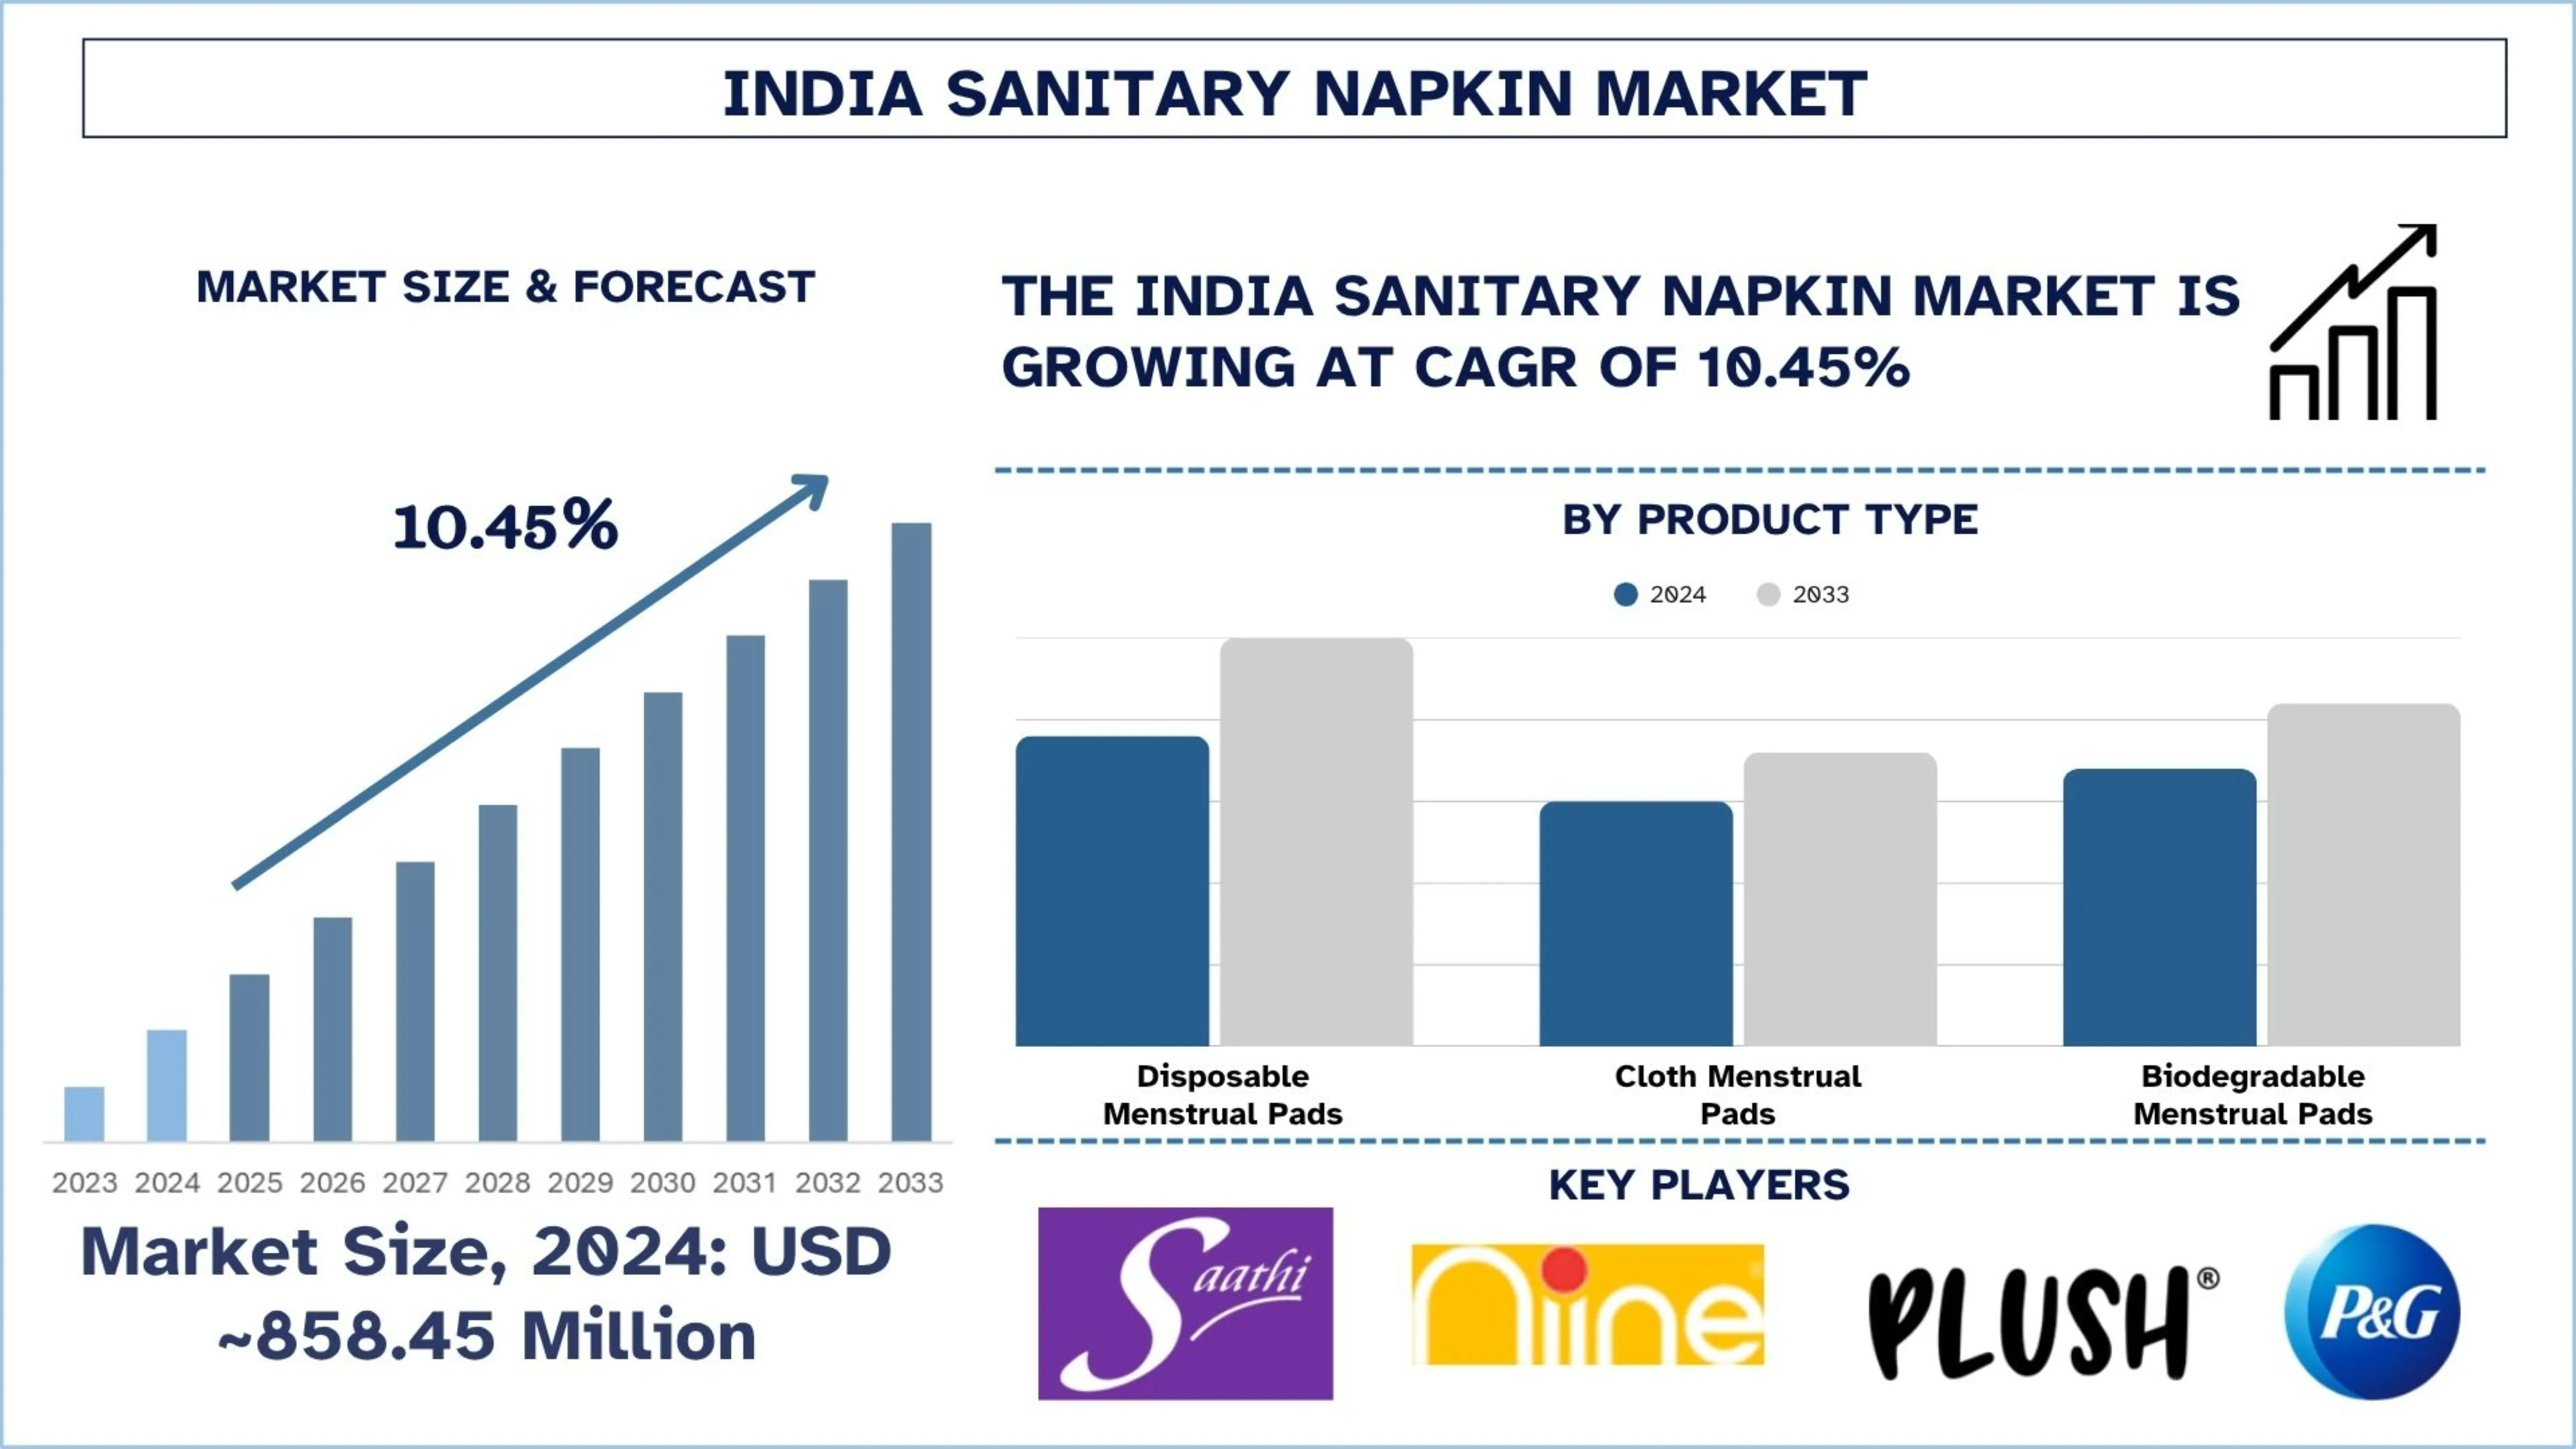
According to the UnivDatos, government subsidy programs, growing female literacy, increased awareness about menstrual hygiene, rising urbanization, and the expansion of both retail and digital sales channels. Corporate CSR and NGO-led distribution programs also play a crucial role in market penetration, driving the India Sanitary Napkin market. As per their “India Sanitary Napkin...
Taxi app development is quickly changing to satisfy rising user expectations for convenience, speed, and dependability in today's fast-paced digital environment. It gives you the resources that you need to succeed in a cutthroat industry, from automating tedious procedures to using data analytics to make better decisions. Let's see how the taxi app development solution...

Executive Summary Container Liner Market : Container liner market is expected to gain market growth in the forecast period of 2022 to 2029. Data Bridge Market Research analyses the market to grow at a CAGR of 5.70% in the above-mentioned forecast period. The market analysis and insights included in the Container Liner Market report presents key statistics on the market...
I strongly suggest the Kizu Cushion to anyone who has trouble sitting comfortably. This cushion is very supportive and comfortable, whether you work at a desk for long hours, move a lot, or have back or tailbone pain. Because it is well-made, flexible, and ergonomic, it will provide long-lasting relief. It is an investment in both short-term comfort and long-term health. It comes...

A few small scratches on your vehicle could appear like minor inconveniences; however, they could affect the look and value of your vehicle over time. Many people wonder if the car paint shop near me can be the most effective choice to fix these flaws or if they're able to fix it at home with solutions. In reality, going to an experienced shop such as 2G Autobody guarantees that scratches are...