Learn RV window replacement steps to ensure a proper secure and lasting installation
Replacing your RV windows might seem intimidating, but with the right steps, it can be a straightforward project that improves your RV’s comfort, safety, and energy efficiency. Whether your windows are cracked, fogged, leaking, or simply outdated, learning the process of RV window replacement can save you money and extend the life of your motorhome.
In this guide, we’ll walk you through the key steps to ensure a secure and long-lasting installation—without the guesswork.
Why RV Window Replacement Matters
Your RV windows do more than just provide a view—they’re essential for ventilation, insulation, and overall comfort. Over time, seals can wear out, frames can warp, and glass can develop condensation between panes. Replacing your windows promptly helps:
-
Prevent water leaks and interior damage.
-
Maintain interior temperature in hot or cold weather.
-
Reduce road noise during travel.
-
Improve overall aesthetics and resale value.
Tools and Materials You’ll Need
Before starting the replacement process, gather the necessary tools:
-
Screwdrivers (Phillips and flathead)
-
Socket wrench set
-
Putty knife or scraper
-
Caulking gun and sealant (RV-safe)
-
Butyl tape or foam sealing tape
-
Replacement RV window (measured accurately)
-
Safety gloves and goggles
-
Clean rags
Step-by-Step RV Window Replacement Process
1. Measure the Existing Window
-
Measure both the height and width of the rough opening, not the glass alone.
-
Double-check measurements—RV window sizes can vary by model and year.
-
Order a replacement that matches your measurements exactly for a proper fit.
2. Remove the Old Window
-
From inside the RV, remove any blinds, curtains, or trim.
-
Unscrew the mounting screws or bolts holding the frame.
-
Have someone on the outside to support the window as you push it out to prevent it from falling.
3. Clean the Mounting Surface
-
Scrape away old sealant, tape, and debris using a putty knife.
-
Wipe the surface with a clean rag to ensure a smooth bonding surface for the new seal.
4. Apply the New Seal
-
Place butyl tape or foam sealing tape around the outer edge of the window frame.
-
Ensure the tape overlaps slightly at the ends to prevent leaks.
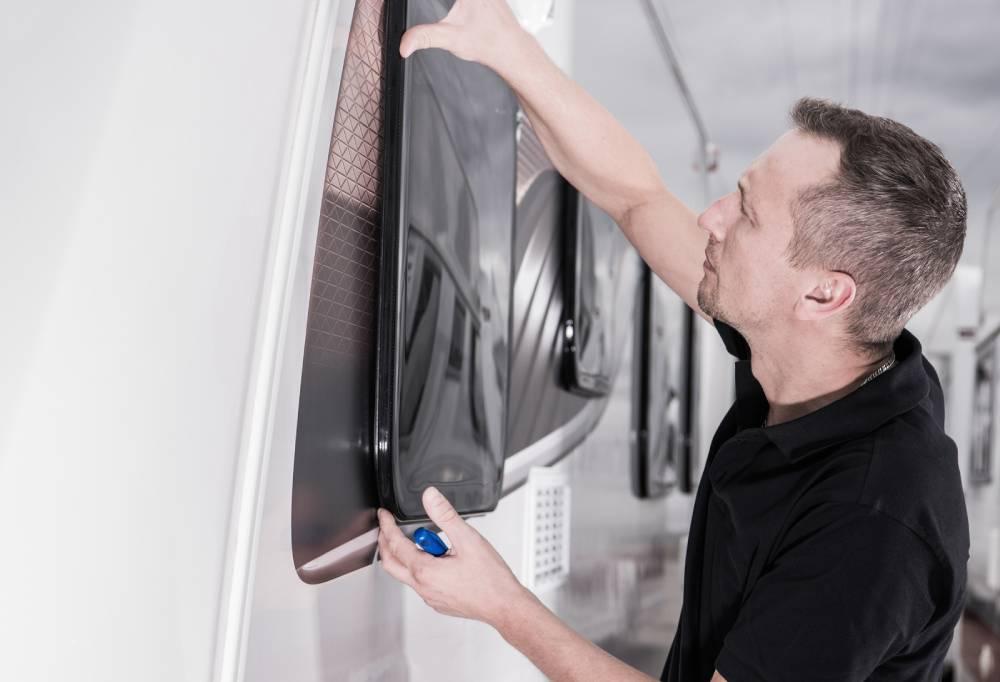
5. Install the New Window
-
With assistance, position the new window into the opening from the outside.
-
From the inside, align the interior frame and start tightening screws evenly in a crisscross pattern.
-
Do not overtighten—this can warp the frame.
6. Seal the Perimeter
-
Apply a bead of RV-safe sealant around the exterior edges of the frame.
-
Smooth it out with a gloved finger or a caulking tool to ensure complete coverage.
7. Test for Leaks
-
After the sealant has cured (per manufacturer instructions), spray water over the window to check for leaks.
-
If you notice any drips, reseal the problem areas immediately.
Tips for a Long-Lasting Installation
-
Choose quality materials: Use sealants and tapes designed specifically for RVs.
-
Avoid shortcuts: Skipping cleaning or applying sealant unevenly can lead to leaks.
-
Inspect regularly: Check seals and frames every season to catch issues early.
-
Store properly: If your RV is in storage for long periods, protect windows from extreme weather with covers.
When to Consider Professional Help
While many RV owners can handle RV window replacement as a DIY project, it may be worth hiring a professional if:
-
You have large or specialty-shaped windows.
-
There’s structural damage around the window opening.
-
You lack the tools or physical ability to perform the job safely.
Conclusion
Learning the right steps for RV window replacement ensures your installation is secure, leak-free, and built to last. With accurate measurements, proper sealing, and attention to detail, you can restore your RV’s comfort, appearance, and functionality—saving money and avoiding costly water damage down the road.
Whether you tackle it yourself or hire an expert, replacing your RV windows is an investment in both your vehicle’s value and your travel enjoyment. The road ahead looks a lot brighter when you’re looking through clear, well-installed windows.
الأقسام
إقرأ المزيد
Executive Summary Middle East and Africa API Intermediates Market Data Bridge Market Research analyses that the market is growing with a CAGR of 5.3% in the forecast period of 2021 to 2028 and is expected to reach USD 1,188.62 million by 2028. Analysis and discussion of important industry trends, market size, and market share estimates are also covered in the credible Middle East and...
"Executive Summary Smart Bands Body Area Network Market : Data Bridge Market Research analyses that the smart bands body area network market which was growing at a value of 11.76 billion in 2021 and is expected to reach the value of USD 32.85 billion by 2029, at a CAGR of 13.70% during the forecast period of 2022-2029. The market insights and market analysis about...
How cards are displayed is very important in the world of card games. Whether for a friendly game of poker or display, the packaging of playing cards demonstrates the attention to quality that the brand gives. A playing card box protects the cards, makes them show well, and offers a better experience to the user. As there are so many different options today, learning about the structure and how...

Introduction A radiant, symmetrical, and camera-ready smile—once only seen on celebrities—is now within reach for everyone. A Hollywood Smile in Dubai is more than just dental work; it’s a complete cosmetic transformation tailored to elevate your confidence and appearance. At Zenon Dental Clinic, we blend art with advanced dental science to deliver flawless, customized...

When people talk about road safety, they usually mention seatbelts, airbags, or driving habits. But there’s one element often overlooked—the seat itself. A driver’s seat shapes comfort and concentration from the moment you sit down. That’s why so many motorists now look to quality seats Australia as a practical investment, not just for comfort, but for the confidence...